")


Understanding Chimney Flashing: An Overview
Chimney flashing is that crucial part of your roof that keeps water from sneaking into your home where the chimney and roof meet. Think of it as the unsung hero that fights against leaks. Done right, it involves layering materials—metal, typically—to create a waterproof barrier. There are two main types: step flashing that goes along the sides of the chimney, matching the steps in the roof’s shingles, and counter flashing that gets embedded into the chimney’s mortar joints to cover the step flashing. Both types work together to keep your home dry and cozy. Not having proper flashing, or if it’s damaged, can spell trouble, leading to water damage inside your home. This might mean stains on your walls or ceiling, or worse, mold growth. So, understanding chimney flashing isn’t just about the technical stuff; it’s recognizing its role in protecting your home from the elements.

Why Chimney Flashing is Crucial for Your Home
Chimney flashing is like the superhero of your roof. It’s not flashy, but it’s essential to keeping your home safe and dry. Flashing is the material—usually metal—that seals the gap between your chimney and roof. Its job? To stop water from sneaking into your home. Imagine water getting in every time it rains—that’s trouble. Without proper flashing, water can damage your roof, ceilings, walls, and even the structure of your house. Plus, moisture problems can lead to mold, which nobody wants. In short, good chimney flashing means a dry, safe home. Without it, you’re inviting water damage and all the headaches that come with it.
Types of Chimney Flashing Material
When we talk about chimney flashing, we’re diving into the world where metal meets roof. There are mainly four types of materials kicking around: aluminum, copper, steel, and lead. Let’s break it down. Aluminum is like the friendly neighbor. It’s lightweight and doesn’t hit the wallet hard, but it doesn’t shake hands well with concrete or masonry. Get it close to that, and corrosion walks in. Then, there’s copper. The classy one. It boasts a long life and looks better with age, like fine wine. However, your bank account might feel a bit lighter. Steel steps in as the tough one. It’s stronger than aluminum and shows rust the door if treated right with a nice coat of galvanization. Last, but ancient, is lead. Bendy and durable, it plays well with all roofing materials. Yes, it’s heavier on the pocket, but it molds like clay and lasts ages. Choosing the right material is about balancing your budget with your roof’s needs. Remember, a good hat for your chimney means a dry and happy home.
Signs Your Chimney Flashing Needs Attention
Chimney flashing keeps water from sneaking into your home where the chimney meets the roof. But, like anything else, it doesn’t last forever. Recognizing when it’s time for a checkup can save you a lot of headache and cash. Look out for these telltale signs: leaks inside your home near the chimney, a glimpse of daylight through your roof around the chimney area, or pieces of metal flashing on the ground. These clues hint that your flashing isn’t holding up its end of the bargain. Water stains on the ceiling or walls near your chimney are a dead giveaway too. If you spot any of these issues, it’s time to call in a pro. Ignoring them can lead to bigger, more expensive problems. Regular checks, especially after heavy storms, can keep your chimney flashing in good shape for longer.
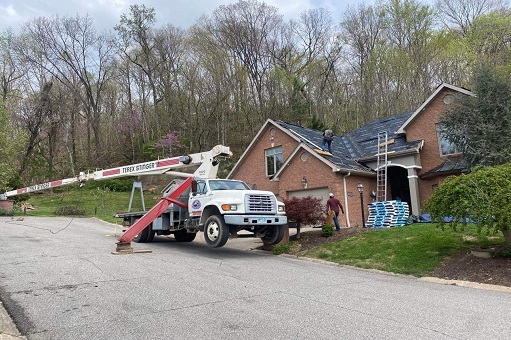
The Process of Installing Chimney Flashing
Installing chimney flashing is a critical step in preventing water damage to your home. It’s like wrapping your chimney in a protective layer to keep the rain out. Here’s how it goes down. The roofer first checks the chimney’s condition to make sure it’s solid. No use in flashing a chimney that’s about to crumble. Then, they clean the area, removing old flashing, mortar, and any debris. Clean as a whistle. Next up, they measure and cut the new flashing to fit. No guesswork here; precision is key. They install the base flashing first, which goes under the shingles and up against the chimney. It’s like laying the foundation for a house. Then comes the counter flashing. This part is attached to the chimney and bends down over the base flashing. It creates a kind of water-tight seal that rain can’t beat. Last comes sealing. They’ll use caulk or mortar to seal the edges of the flashing, making sure no water can sneak through. Done right, this keeps your chimney and home dry for years. Keep in mind, this is a job for pros. Mess it up, and you’re inviting leaks. So, if you’re not a seasoned DIYer, better to watch this one from the sidelines.
Common Issues and Solutions in Chimney Flashing
Chimney flashing problems can lead to water leaks and serious damage to your home if ignored. The most common issue is when the flashing becomes loose or damaged, allowing water to seep in. This often happens because of weather exposure or poor installation. Cracks in the caulking around the flashing are another typical problem, as well as rust on metal flashings which weakens them over time.
Fixing these issues starts with identifying the type of flashing problem. For loose or damaged flashing, it usually means resealing or replacing sections of the flashing. If the caulking is cracked, applying a new layer of high-quality, waterproof caulk is often enough. Rusty flashing, however, might need to be replaced entirely to ensure a watertight seal.
Remember, while some homeowners feel comfortable tackling these repairs on their own, it’s often best to hire a professional. This ensures the job is done right, avoiding further damage and potentially higher repair costs down the road. Plus, a pro can spot additional issues you might miss. Keep on top of chimney flashing maintenance, and you’ll save yourself a lot of headaches and money.
Maintenance Tips for Long-Lasting Chimney Flashing
Keeping chimney flashing in top shape is simpler than it sounds, but you must stay on top of it to avoid costly repairs down the line. First off, inspect your chimney flashing at least once a year, preferably before the rainy season hits. Look out for any signs of wear and tear, such as cracks or rust. If you spot minor issues, a quick patch-up might be all you need. However, if the damage is more serious, it’s smarter to replace the flashing entirely to prevent water from seeping into your home. Also, keep an eye on the sealant. Over time, it can degrade, so reapplying it can prevent water damage. To ensure the flashing’s longevity, trim any branches hanging directly over your chimney. This reduces the risk of physical damage and keeps debris from clogging the area, which can retain moisture and cause the metal to corrode. Remember, the key is proactive care. A little effort now can save you from a headache and hit to the wallet later.
DIY vs. Professional Installation: What’s Best for You?
Deciding whether to install chimney flashing yourself or hire a professional comes down to a few key points. Installing chimney flashing is not just about climbing up on your roof and slapping some material around your chimney. It requires precise measurements, the right materials, and knowing how to seal it properly to prevent leaks.
If you’re thinking about doing it yourself, here’s what you need to consider. First, you need confidence in your ability to work safely at height. Mistakes can not only damage your chimney or roof but can lead to serious injury. You’ll also need to be familiar with the materials. Flashing usually involves metal sheets, but choosing between aluminum, copper, or galvanized steel depends on your chimney and roof type. Each material behaves differently and requires specific tools and skills to install correctly.
On the other hand, hiring professionals may seem like the more expensive route, but it has its advantages. Pros have the right tools, extensive experience, and can spot potential issues before they become major problems. They’ll ensure that your chimney flashing is installed correctly and will last for years, protecting your home from water damage. In most cases, professionals offer warranties on their workmanship, giving you peace of mind.
So, what’s best for you? If you have the skills, confidence, and time, DIY can save you some money upfront. However, if you’re unsure about any aspect of the installation, it’s worth investing in professional services. The upfront cost can prevent expensive repairs down the line, making it a wise choice for the long term.
The Cost of Repairing or Replacing Chimney Flashing
Fixing or swapping out chimney flashing isn’t something you do on a whim; it’s crucial for keeping water out of your home. Now, let’s talk brass tacks: the price. It isn’t as straightforward as you’d hope. The cost can swing wildly based on a handful of factors. First off, you’re looking at materials. Aluminum and galvanized steel are your budget-friendly picks, floating around (10 to )20 per linear foot. Opting for copper, though, will jack up the price, pushing it to (15 to )30 per linear foot. Your location messes with the price, too. Living in a high-cost area? Brace yourself for higher bills. Then, there’s the damage extent. A simple repair might just nick your wallet, but if you’re staring down the barrel of a total overhaul—think full replacement—you’re looking at a hefty sum, possibly upwards of a few grand. In numbers, small repairs might cost you a few hundred bucks, while a complete replacement dances around (1,000 to )3,000. And don’t forget, the person doing the job matters. A seasoned pro might charge more, but they’ll ensure the job’s done right. Bottom line: you get what you pay for, and when it comes to something as critical as chimney flashing, cutting corners just isn’t worth the risk.
Summary: Protecting Your Home with Proper Chimney Flashing
Chimney flashing is your roof’s best defense against water damage. It’s that bit of metal that keeps rain and snow from sneaking into where your chimney meets your roof. If it’s not done right, water gets in, leading to mold, mildew, and rot—big problems you don’t want. There are two main types: step flashing and counter flashing. Step flashing slides under the roofing material and bends against the chimney. Counter flashing then covers the step flashing and is embedded into the chimney mortar. It sounds complex, but it’s basically a double barrier against water. It’s crucial to check this setup regularly. If the flashing is damaged or missing, it’s like leaving your door wide open in a storm. Repair costs for water damage easily run into thousands, while fixing or updating flashing is way less—think prevention over cure. Make sure your flashing game is strong and save yourself a headache and hefty repair bills.


0 Comments