Hey there! If you’re thinking about a new roof for your home, you’re in the right place. We’ve got the lowdown on the whole new roof installation process and how it might impact your wallet.
So, grab a cup of coffee and let’s dive in!
Step 1: Roof Inspection and Assessment
First Things First: The Roof Inspection
Okay, picture this: you’re getting ready for a new roof installation and need to know where you stand. That’s where the roof inspection and assessment come into play. This isn’t just any inspection; it’s a pro roofing contractor going over your roof with a fine-tooth comb. They’re checking for signs of wear and tear, leaks, and structural issues lurking up there.
Why is this important? It tells you whether you need a complete roof overhaul or if some repairs will do the trick. Plus, it helps the contractor determine what materials and techniques are best for your roof and local climate. No one-size-fits-all here!
But wait, there’s more. Let’s explore this crucial first step in a bit more detail.
The Importance of a Thorough Inspection
Think of the roof inspection as the detective work of the roofing world. It’s where the pros gather clues about your roof’s condition. They’re like Sherlock Holmes, but with shingles!
During the inspection, they’ll:
Check for missing or damaged shingles.
Look for signs of leaks or water damage.
Inspect the condition of the roof deck.
Assess the overall structural integrity.
Now, you might wonder why all this detective work is necessary. Well, the condition of your existing roof sets the stage for everything that comes next. If there are hidden issues, they need to be uncovered and addressed before moving forward.
Step 2: Roofing Material Selection
Choosing the Right Roofing Material
Alright, you’ve got some decisions to make. What kind of roofing material do you want? Let’s break it down:
Asphalt Shingles:
These are the go-to for many folks. They’re budget-friendly and durable, with lots of styles and colours to choose from.
Metal Roofing:
Want something that lasts practically forever? Metal roofing’s your answer. It’s challenging and needs minimal maintenance.
Wood Shakes:
Wood shakes might be your jam if you’re all about that rustic look. Remember, though, they require a bit more TLC and are fire-sensitive.
Tile Roofing:
For a touch of elegance, consider tile roofing. It’s super durable but heavier than other options, so make sure your roof structure can handle it.
Each material has unique charm and practicality, like picking the right outfit for a special occasion. But wait, there’s more to this step than just the materials. Let’s dig deeper.
Step 3: Obtaining Necessary Permits
Before you get too excited, there might be some paperwork involved. Depending on where you live and the scope of your project, you might need permits from your local government or homeowners’ association.
This isn’t to hassle you; it’s to ensure your new roof follows your area’s rules and codes. Safety first, right?
Let’s get into the nitty-gritty of why permits matter.
Keeping It Legal
Permits are like the golden ticket in the roofing world. They’re your pass to making sure everything is above board. Here’s why they’re essential:
Compliance:
Permits ensure that your new roof complies with all the local building codes and regulations. These codes are there for safety, and they help protect your investment.
Accountability:
When you have permits, you know the work is done by professionals who follow the rules. It’s like having a referee at a game to ensure everyone plays pretty.
Insurance:
Some insurance companies might need to see that you have the proper permits when getting your roof replaced. It can impact your coverage and any potential claims.
So, while it might seem like a bureaucratic hassle, permits are an essential part of the process. They help keep your project on the right track and ensure everything is done safely and correctly.
Step 4: Tear Off the Old Roof
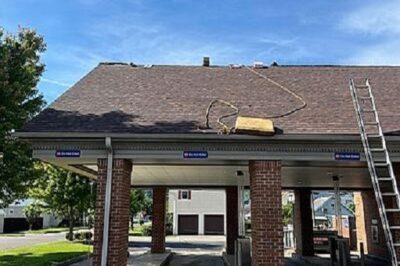
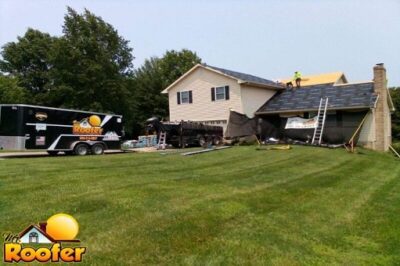
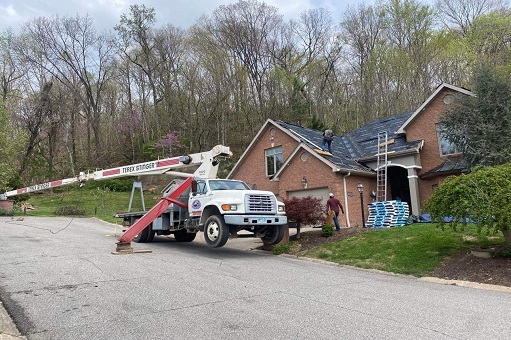
It’s time for some demolition! If your roof needs a complete makeover, it’s time to say goodbye to the old stuff. This involves stripping away those tired old shingles, the underlayment, and any damaged deck underneath.
And don’t forget proper disposal – gotta keep things tidy!
But why go through all this trouble?
Let’s explore why tearing off the old roof is a crucial part of the process.
Starting Fresh
Imagine trying to bake a fresh batch of cookies on a pan with crumbs from the last batch still stuck. That wouldn’t be ideal, right? Well, the same goes for your roof.
Tearing off the old roof has several benefits:
Spotting Hidden Issues:
Sometimes, problems lurk beneath the surface. Removing the old roof reveals hidden issues like damaged decking or water damage that need attention.
Clean Surface:
Your new roofing materials need a clean slate to adhere correctly. Removing the old roof ensures that there are no obstacles in their way.
Quality Assurance:
It’s like laying a solid foundation for a building. Starting fresh ensures the new roof is built on a solid, problem-free base.
So, while it might seem like a bit of extra work, tearing off the old roof sets the stage for a successful new roof installation.
Step 5: Roof Deck Inspection and Repairs
Once the old stuff is out, getting hands-on with that roof deck is time. Inspect it for damage or rot – we don’t want any nasty surprises later. If there are issues, this is where they get sorted out. Strong deck, strong roof!
But wait, why all this fuss about the deck? Let’s break it down.
The Deck’s Role
Your roof deck is like the foundation of your house. It’s the sturdy base that everything else relies on. So, making sure it’s in top shape is crucial. Here’s why:
Structural Integrity:
A damaged or weakened deck can’t support the weight of your new roof. It’s like trying to build a house on a shaky foundation – it won’t end well.
Preventing Future Problems:
If there’s any rot or damage in the deck, fixing it now is much easier and more cost-effective than dealing with it later when it could cause more extensive damage.
Ensuring Longevity:
A strong deck contributes to the long life of your roof. It’s like investing in quality materials for a DIY project. You want it to last!
So, think of the deck inspection and roof repairs as the backbone of your roofing project. It might not be the flashiest part, but it’s essential.
Step 6: Underlayment and Flashing Installation
Layering It Up: Underlayment and Flashing
Now, we’re getting into the nitty-gritty. We lay a high-quality underlayment on the deck to keep your roof waterproof. Think of it as an extra shield against moisture. Then, we install flashing in vulnerable spots like valleys, chimneys, and vents. Flashing keeps water from sneaking in where it shouldn’t.
But why do we need these extra layers? Let’s peel back the layers and understand their importance.
Underlayment: The Moisture Barrier
Imagine you’re making a sandwich. The bread might be delicious, but it needs something to keep the moisture from your juicy fillings from making it all soggy, right? That’s where the underlayment comes in.
Waterproofing
The underlayment is like the plastic wrap around your sandwich. It prevents moisture from seeping into your home.
Secondary Protection
If, for some reason, water gets past your shingles, the underlayment is a second line of defence. It adds an extra layer of protection against leaks.
Added Lifespan
Just as a well-wrapped sandwich stays fresh, a roof with proper underlayment can have a longer life.
Flashing: The Leak Stopper
Have you ever tried to patch up a leak in an old bucket with duct tape? It might work for a while, but it is not a long-term solution. That’s where flashing comes in.
Sealing Vulnerable Spots:
Flashing is like the silicone sealant that stops leaks. It’s used around areas prone to water intrusion, like roof valleys, chimneys, and vents.
Preventing Water Damage:
Without flashing, water could find its way into your home through these vulnerable spots. Flashing redirects water away from these areas, keeping your home dry.
Extending Roof Life:
By preventing leaks, flashing contributes to the longevity of your roof. It’s like the guardian that stands between your home and water damage.
So, while these might not be the show’s stars, underlayment and flashing are the unsung heroes that keep your roof strong and waterproof.
Step 7: Roofing Material Installation
This is where your chosen roofing material takes centre stage. Let’s break it down by type:
Asphalt Shingles:
Start with those starter shingles, then lay down the primary layer. It’s all about proper overlap and nailing techniques for wind resistance.
Metal Roofing:
There are various installation methods here, depending on your specific type of metal roofing. The goal is secure panels, sealed seams, and good ventilation.
Wood Shakes:
Each shake gets placed individually, giving them that rustic charm. Careful spacing and ventilation are essential.
Tile Roofing:
Tiles go in individually, often secured with nails or hooks. Alignment and overlap are crucial, considering the weight of tile roofing.
But wait, why all these different methods? Each material has unique characteristics and needs to be handled just right. Let’s explore this further.
Step 8: Ridge Vent and Ventilation
Breathing Easy: Ventilation
Your roof isn’t just about the outside; it’s also about what’s going on inside. That’s where ridge vents and other ventilation systems come into play. They keep your attic’s temperature and moisture levels in check.
In the summer, it keeps things cool and reduces energy costs. In the winter, it prevents mould and mildew. It’s a win-win!
But why does your roof need to breathe? Let’s get some fresh air on this topic.
The Importance of Ventilation
Your attic isn’t just a forgotten space above your home; it plays a vital role in your roof’s health. Proper ventilation ensures:
Temperature Regulation:
Ventilation helps maintain a consistent temperature in your attic. This prevents excessive heat buildup in the summer, which can damage your roofing materials.
Moisture Control:
Attic ventilation prevents moisture buildup, which can lead to mould, mildew, and rot. It’s like having a dehumidifier for your attic.
Energy Efficiency:
Ventilation can lower your energy bills by reducing the strain on your HVAC system. A cooler attic means your air conditioner doesn’t have to work as hard.
So, while it might seem like an invisible part of your roof, proper ventilation is the secret to a long-lasting, energy-efficient home.
Step 9: Cleanup and Inspection
Almost there! After all that hard work, it’s time to clean up. We’re talking about a spotless job site – no debris left behind. Then comes the moment of truth: a final inspection. We ensure your new roof installation is up to snuff, meets all the quality standards, and is defect-free. It’s like the cherry on top of your roofing sundae.
But why the fuss about cleanup and inspection? Let’s shine a spotlight on this critical step.
The Cleanup Act
Cleaning up might not be the most glamorous part of the job, but it’s essential for a few reasons:
Safety:
A clean job site is a safe job site. It reduces the risk of accidents and injuries for the workers and your family.
Curb Appeal:
A tidy yard and surroundings make your home look better during and after the installation. Your neighbours will appreciate it too!
Quality Assurance:
The final inspection is where we make sure everything is perfect. We want your roof to perform flawlessly, which means checking every detail.
The Inspector’s Eye
The final inspection isn’t just a formality; it’s your quality guarantee. Here’s what it involves:
Checking for Defects:
We go over every inch of your roof to ensure there are no defects, missing shingles, or issues with the installation.
Quality Control:
We ensure that all the materials are used correctly and that the installation meets or exceeds industry standards.
Peace of Mind:Once the inspection is done, you can rest easy knowing that your new roof is beautiful and built to last.
So, while it might be the last step, it’s one of the most important. It’s where we dot the i’s and cross the t’s to protect your investment.
New Roof Installation Cost
Let’s talk money. A new roof isn’t pocket change but an investment in your home’s future. The cost can vary, and it depends on several factors:
Roofing Material: Here’s the scoop on material costs:
Asphalt Shingles:
Budget-friendly, usually from $3 to $5 per square foot.
Metal Roofing:
Moderate to high cost, typically between $5 to $12 per square foot.
Wood Shakes:
Can be pricier, ranging from $6 to $11 per square foot.
Tile Roofing:
Often among the most expensive, ranging from $10 to $20 per square foot.
Roof Size and Complexity:
Size matters, folks! A bigger or steeper roof needs more materials and labour, which means a higher bill.
Labour Costs:
Labor costs can swing widely depending on where you live. Urban areas often have steeper labour rates than rural ones. The complexity of your installation, like the number of roof features (dormers, skylights, chimneys), can also impact labour costs.
Additional Costs:
Don’t forget about removing the old roof, deck repairs, and ventilation systems. These can all add to the total cost.
Geographic Location:
Local factors like climate and building codes can also play a part. Areas prone to extreme weather might require extra materials and labour.
To get an accurate estimate for your project, reach out to some roofing pros. They’ll consider all these factors and give you a detailed cost breakdown.
Investing in Your Home’s Future- Teh Conclusion
A new roof installation is a big deal for your home’s looks and protection. Understanding the process and costs can help you make intelligent choices. So, work with a top-notch roofing contractor to get the job done right, and rest assured that you’re not just spending money—you’re investing in your home’s future. A well-done roof keeps you dry and adds value to your property.
So, there you have it—a comprehensive guide to the new roof installation process and the costs involved. Armed with this knowledge, you can confidently embark on your roofing journey. Remember, a well-executed new roof installation not only enhances the beauty of your home but also provides essential protection against the elements. Happy roofing!
What are the benefits of proper roof ventilation?
Proper roof ventilation is essential for maintaining the health and longevity of your roof. It helps regulate temperature and moisture levels in the attic, reducing the risk of mould growth, ice dams, and premature shingle deterioration.
Ventilation also contributes to energy efficiency by preventing excess heat buildup in the summer.
Do I need permits for a new roof installation?
Permit requirements vary by location and the scope of your roofing project. You will often need permits from your local government or homeowners’ association. These permits ensure that your new roof complies with building codes and regulations.
How can I estimate the cost of a new roof installation?
The cost of a new roof installation depends on various factors, including the type of roofing material, the size and complexity of your roof, labour costs, and geographic location.
To get an accurate estimate, obtaining quotes from roofing contractors in your area is advisable. They can assess your specific project and provide a detailed cost breakdown.
Is it necessary to remove the old roof before installing a new one?
In most cases, removing the old roof is recommended before installing a new one. This allows for a thorough inspection of the roof deck, ensures proper installation of underlayment and flashing, and provides a clean surface for the new materials.
However, some local building codes and circumstances may allow for a re-roofing (adding new shingles over existing ones) if conditions permit.
How long does a new roof installation typically take?
The duration of a new roof installation varies depending on factors such as the size and complexity of your roof, weather conditions, and the type of materials used. It can take anywhere from a few days to a couple of weeks.


0 Comments